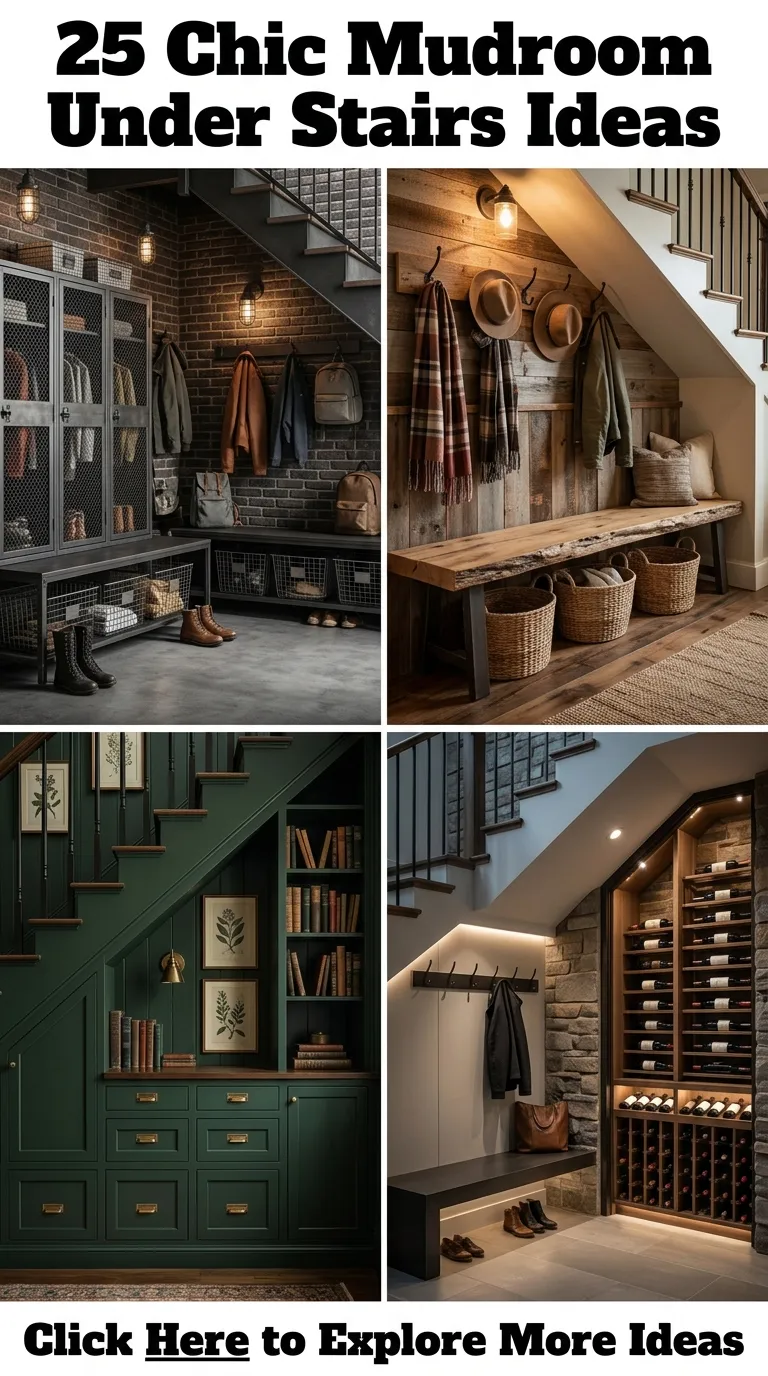
Transforming the often-overlooked area beneath a staircase into a stylish, fully functional mudroom is one of the smartest space-saving upgrades you can make in a modern home. Whether you are dealing with a tight entryway, a broad central hall, or a suburban foyer, the under-stair alcove offers untapped potential for coats, shoes, bags, and daily essentials.
Here are 20 chic, realistic mudroom designs tailored for the under-stair space, along with detailed advice on how to build them, style them, and adapt them to your routine.


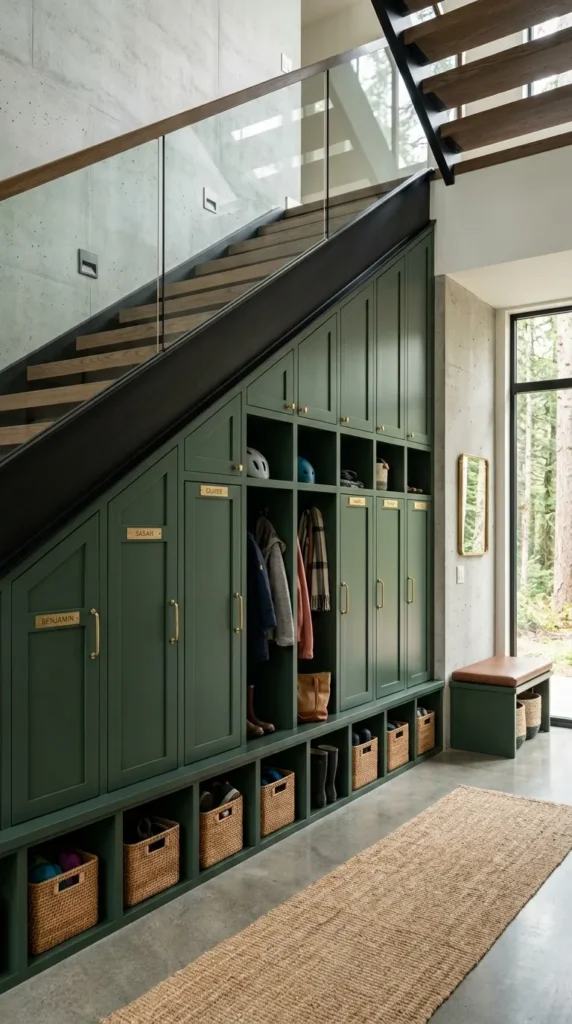
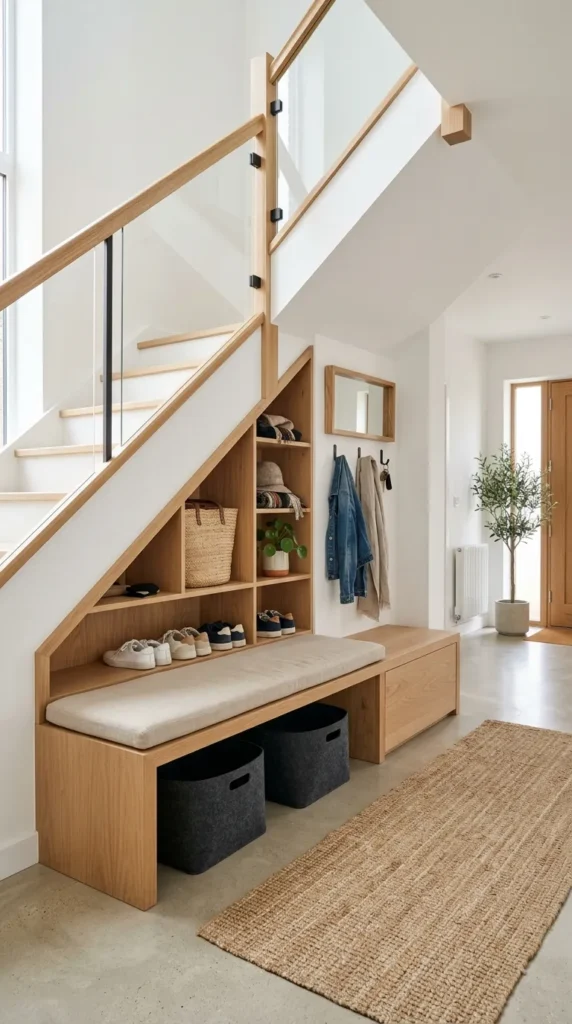
1. The Built-In Scandinavian Bench & Cubby Hybrid
Introduction
Scandinavian design focuses on clean lines, light woods, and clutter-free living. A Scandi-style under-stair mudroom relies on open oak or birch cubbies, a sleek wooden bench, and soft white walls. It brings warmth, order, and visual lightness to narrow entryways without overwhelming the space.
How to Build It
Measure the slope of your stairs precisely. Build or buy a low-profile bench made from pale oak or light pine that fits securely into the lowest part of the incline. Above the bench, mount open cubbies following the stair angle. Sand the wood smooth and apply a matte, clear protective coat to preserve the natural grain.
Tips & Variations
- Material Pick: Use blonde woods like ash, oak, or light maple.
- Storage Hack: Use minimalist felt or light gray woven baskets inside the cubbies to hide loose odds and ends.
- Variation: Swap top cubbies for a single, long floating shelf with brass hooks underneath for a lighter visual footprint.
2. Mood Night: Dark Charcoal Built-in Cabinetry
Introduction
If your taste leans toward sophisticated, moody interiors, dark charcoal or deep navy built-in cabinetry turns an awkward nook into an architectural feature. Deep colors disguise daily scuffs and add dramatic contrast, especially in homes with white or neutral hallway walls.
How to Build It
Construct custom cabinet doors and drawers fitted specifically to the stair angle. Paint the cabinetry using a satin or semi-gloss interior finish in charcoal, off-black, or deep navy. Install flush-mount brass, satin nickel, or leather pull handles to elevate the finished look.
Tips & Variations
- Lighting: Install recessed warm LED strip lights along the top frame or underside of shelves so the dark alcove doesn’t feel lost in shadow.
- Durability: Apply a scuff-resistant paint formula suitable for high-traffic zones.
- Variation: Add a dark velvet or rich brown leather bench cushion for textural contrast.
3. Vertical Board and Batten Accent Nook
Introduction
Board and batten accent walls add immediate architectural character, depth, and vintage charm. Utilizing vertical wooden slats under the stairs creates a textured background where coat hooks can be mounted seamlessly at varying heights for adults and children alike.
How to Build It
Attach vertical MDF or pine strips (spaced 12 to 16 inches apart) directly to the drywall under the staircase. Add a top horizontal casing rail that runs along the stair incline. Fill nail holes, caulk the edges, and paint the entire wall and trim in a cohesive color, such as sage green, classic ivory, or soft blue-gray.
Tips & Variations
- Hook Placement: Mount heavy-duty forged iron or antique brass hooks directly onto the vertical battens for maximum weight support.
- Color Palette: Muted earth tones work best here to enhance the classic craftsman feel.
- Variation: Run the board and batten halfway up and cap it with a narrow ledge to display small framed prints or pottery.
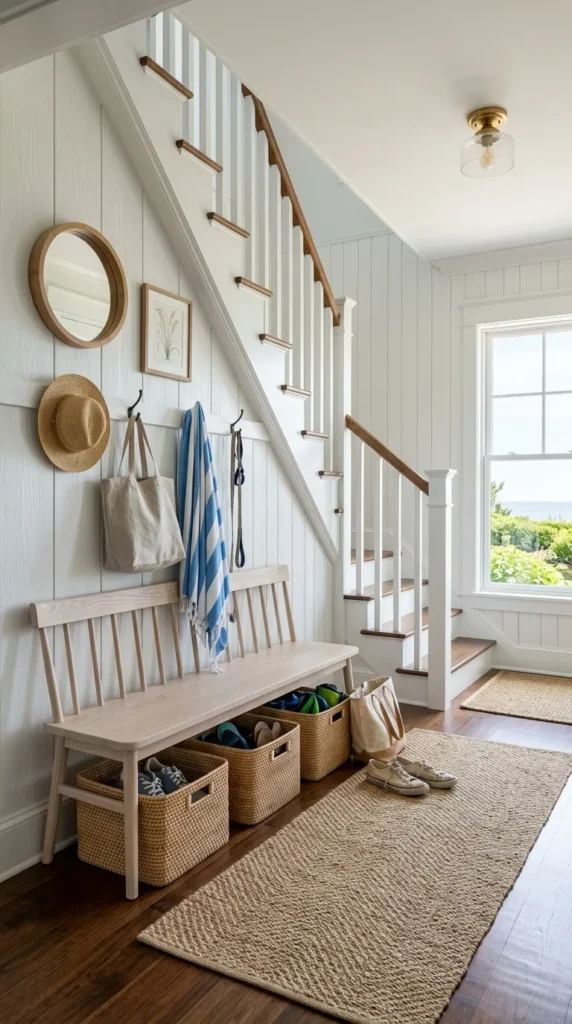
4. Coastal Cottage Beadboard Nook
Introduction
Bring a relaxed, airy coastal aesthetic into your entryway with crisp white beadboard panelling, natural rattan baskets, and light wood accents. This style feels welcoming, bright, and effortlessly organized.
How to Build It
Line the back wall of the under-stair cavity with pre-cut beadboard panels. Install a sturdy white-painted bench with open shoe storage underneath. Frame the outer edges with simple flat trim to clean up the transitions against your staircase frame.
Tips & Variations
- Accessories: Pair with natural jute rugs, woven sea-grass baskets, and nautical hardware.
- Color Tip: Bright crisp white paired with soft sea-foam or duck-egg blue trim works beautifully.
- Variation: Install a flip-top bench seat with hidden interior trunk storage instead of open shoe shelves.
5. Floating Bench with Pull-Out Shoe Trays
Introduction
For homes with minimal floor space, a heavy-duty floating bench creates an airy, uncluttered feel while maintaining complete functionality. By lifting the bench off the floor, you free up floor space underneath for sleek, slide-out shoe trays or low profile baskets.
How to Build It
Secure heavy-duty steel hidden floating shelf brackets directly into the wall studs along the stair incline. Mount a thick hardwood slab (2 to 3 inches thick) onto the brackets. On the floor below, construct or place custom low-profile wooden trays mounted on smooth casters for effortless shoe access.
Tips & Variations
- Safety First: Ensure the wall studs and brackets are rated to support at least 300 to 400 lbs for sitting safely.
- Style Detail: Keep the area minimalist with concealed wall pegs instead of bulky hanging racks.
- Variation: Add under-bench LED puck lights that trigger automatically with motion sensors.




6. Modern Industrial Pipe & Reclaimed Wood Alcove
Introduction
An industrial-style mudroom relies on raw metals, black iron piping, and rich, weathered reclaimed wood. It is exceptionally durable, easy to maintain, and brings an urban edge to rustic or modern industrial homes.
How to Build It
Assemble structural black iron pipes and flange fittings to construct hanging rods and shelf frames tailored to your under-stair slope. Anchor flanges firmly into wall studs. Mount thick reclaimed barnwood planks as seating surfaces and overhead shoe or hat storage.
Tips & Variations
- Finish: Apply a clear matte sealant to reclaimed wood to prevent splinters while retaining character.
- Hardware: Match metal elements with matte black hooks and pipe connectors.
- Variation: Combine raw concrete-look tiles or brick veneer wallpaper behind the pipe framework for extra texture.
7. Modern Farmhouse X-Frame Bench Nook
Introduction
Modern farmhouse style combines practical country living with sleek modern detailing. A mudroom featuring classic ‘X’ brace carpentry details, warm white finishes, and rustic oak surfaces offers a warm, family-friendly aesthetic.
How to Build It
Construct a wooden bench frame featuring diagonal ‘X’ cross-bracing on the outer side panels. Paint the base soft white or greige, and top it with a thick, stained oak top seat. Mount double-prong iron coat hooks against a crisp shiplap background under the stairs.
Tips & Variations
- Wall Backdrop: Horizontal shiplap planks provide the ultimate backdrop for this design style.
- Accent Touches: Use galvanized metal bin organizers or labeled wire baskets for family storage.
- Variation: Add a chalkboard or magnetic notice board section for family schedules and keys.
8. The Minimalist Hidden Door Mudroom Closet
Introduction
If you prefer complete visual tidiness and hate seeing loose coats or shoes, a hidden push-to-open cabinet door system completely conceals your mudroom beneath the staircase. Everything remains accessible behind sleek, wall-matching panels.
How to Build It
Frame out the under-stair opening with full-height, custom-angled cabinet doors made from cabinet-grade MDF. Use concealed touch-latch or push-to-open hinges so no external handles are required. Inside, build out a combination of coat hanging rods, pull-out shoe racks, and tall shelving units.
Tips & Variations
- Seamless Look: Paint the exterior cabinet doors the exact same shade and sheen as the adjacent walls and baseboards.
- Internal Organization: Incorporate vertical dividers for umbrellas, vacuum accessories, or sports gear.
- Variation: Add full-length mirror panels to the outside of the hidden doors to bounce light through the hallway.
9. Modern Archway Mudroom Nook
Introduction
Softening sharp geometric stair lines with a rounded arch opening turns an under-stair space into an elegant architectural feature. Curved design elements feel custom, luxurious, and visually appealing in modern or Mediterranean-inspired interiors.
How to Build It
Frame the outer face of the under-stair opening using curved drywall corner flex-track to build a smooth archway. Drywall, tape, sand, and paint the archway so it blends smoothly into the surrounding wall. Inside the arched recess, install a custom curved bench and soft wall-mounted lighting.
Tips & Variations
- Lighting: A small flush-mount brass light fixture or a subtle back-lit LED halo along the inner arch adds drama.
- Textile: Add a thick tailored cushion in rich linen or boucle to highlight the curve.
- Variation: Tile the inner back wall of the arch with vertical zellige or kit-kat tiles for subtle texture.
10. Pull-Out Diagonal Sliding Pantry Drawers
Introduction
Instead of a walk-in or bench-style alcove, diagonal pull-out vertical drawers utilize 100% of the deep, hard-to-reach space under your stairs. These tall sliding units glide forward on heavy-duty tracks, exposing multiple shelves from the side.
How to Build It
Install heavy-duty, floor-mounted drawer slides rated for high weight capacities (200+ lbs). Construct tall, narrow diagonal wooden frames that slide out smoothly from under the stairs. Divide the interior with slanted shoe shelves, pegboards, and hook sections.
Tips & Variations
- Hardware: Invest in high-quality ball-bearing full-extension drawer glides to ensure smooth motion.
- Efficiency: Divide one drawer specifically for shoes, another for long coats, and a smaller bottom drawer for dog leashes and accessories.
- Variation: Add custom front paneling that matches your staircase risers for a flush finish when closed.


11. Vibrant Wallpaper & Painted Trim Nook
Introduction
Because the under-stair mudroom is a contained space, it is the perfect spot to experiment with bold patterns, vibrant wallpapers, and striking paint colors without overwhelming your main living areas.
How to Build It
Select a durable, scrubable or peel-and-stick patterned wallpaper for the back inner wall of the stair alcove. Paint the surrounding bench, frame, and shelving in a contrasting shade drawn from the wallpaper pattern (e.g., forest green, terracotta, or mustard yellow).
Tips & Variations
- Wallpaper Pick: Botanical, geometric, or vintage floral prints work exceptionally well in small nooks.
- Protection: Apply a clear varnish or protective sealant over lower wallpaper areas if wet coats will rest directly against it.
- Variation: Add colorful ceramic or whimsical brass animal-shaped hooks to match the playful mood.
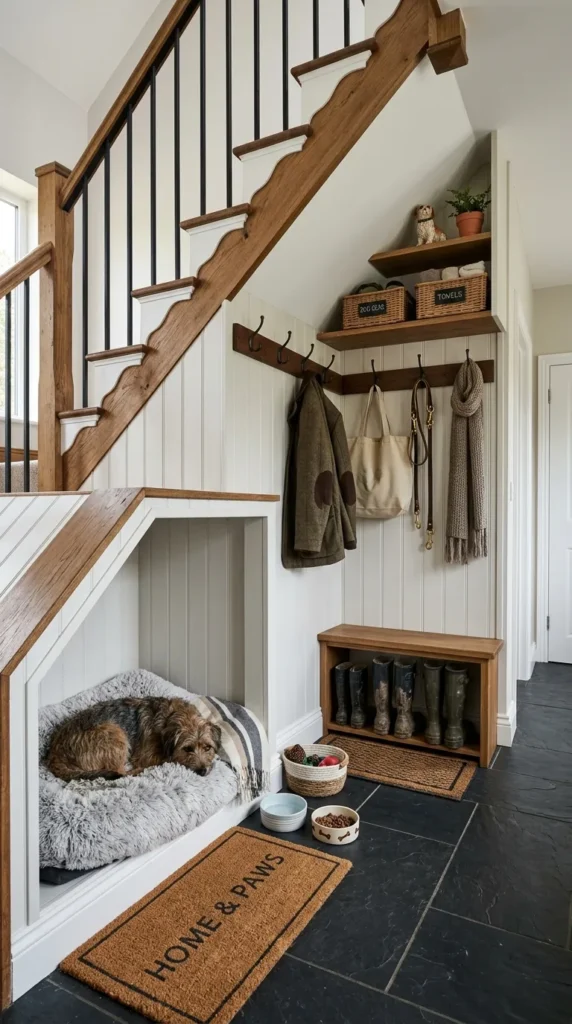
12. Petite Pet-Friendly Mudroom & Dog Den
Introduction
Combine human entryway organization with a dedicated sanctuary for your pets. The lowest taper of the staircase is often too low for comfortable adult seating, making it the ideal spot for a built-in dog bed, while upper sections hold leashes, treats, and coats.
How to Build It
Build open shelving and coat hooks in the taller section of the stair incline. In the lowest angled section, construct a cozy recessed dog nook lined with washable wall panels. Fit a custom-sized orthopedic dog cushion into the base.
Tips & Variations
- Wall Lining: Line the dog den walls with easy-to-clean beadboard or durable wood paneling.
- Storage Hack: Build a small pull-out drawer directly below the pet bed to store toys, grooming brushes, and dog towels.
- Variation: Install a decorative metal mesh screen or soft pocket gate if you need to crate your dog securely.
13. Rustic Timber & Natural Stone Alcove
Introduction
For homes featuring organic, rustic, or modern mountain lodge interiors, incorporating natural materials like rough-sawn timber beams and stone ledger paneling under the stairs brings warmth and earthiness to your foyer.
How to Build It
Cover the back wall with thin stone veneer flats. Mount a heavy, live-edge timber slab using robust concealed steel mounts to serve as the bench. Install hand-forged wrought iron hooks directly into timber wall supports for an authentic craftsman feel.
Tips & Variations
- Sealing: Seal stone veneer properly to make sure dirt from coats can be brushed off easily.
- Baskets: Pair with rough-woven wicker or thick jute storage baskets to complement the organic surfaces.
- Variation: Add a warm, warm-toned lantern-style wall sconce to highlight the stone texture at night.
14. Split-Level Multi-Tiered Family Bench
Introduction
A standard bench height isn’t always ideal for young children. A multi-tiered under-stair design features a higher bench section for adults and a lower step/bench section for kids, making it easy for family members of all ages to put on shoes independently.
How to Build It
Design a stepped bench system following the natural slope of the staircase. The higher section sits at standard seating height (18 inches), while the lower section drops to 12 inches. Construct open cubbies beneath both tiers for shoe storage.
Tips & Variations
- Hooks at Two Heights: Install lower, kid-friendly coat hooks at 3 to 4 feet from the floor, with adult hooks higher up.
- Color Blocking: Consider painting the lower kids’ zone in a fun accent color to define spaces clearly.
- Variation: Add a pull-out step that doubles as extra storage inside the lower bench.
15. Traditional English Country Boot Room
Introduction
Inspired by classical British manor estates, an English country mudroom under the stairs emphasizes timeless elegance, muted heritage colors (like olive green or duck-egg blue), brass fittings, and dedicated boot storage.
How to Build It
Install full-height paneling painted in a soft matte heritage color. Fit a wooden bench with an open lower rack specifically designed with tall vertical slots or metal boot racks to store muddy wellingtons and riding boots.
Tips & Variations
- Hardware: Choose antique unlacquered brass hooks and shell pull handles that age gracefully over time.
- Floor Mat: Place a thick coir mat or woven wool runner right in front of the nook to catch dirt and mud.
- Variation: Include a wall-mounted umbrella holder with a brass drip tray built into the corner.



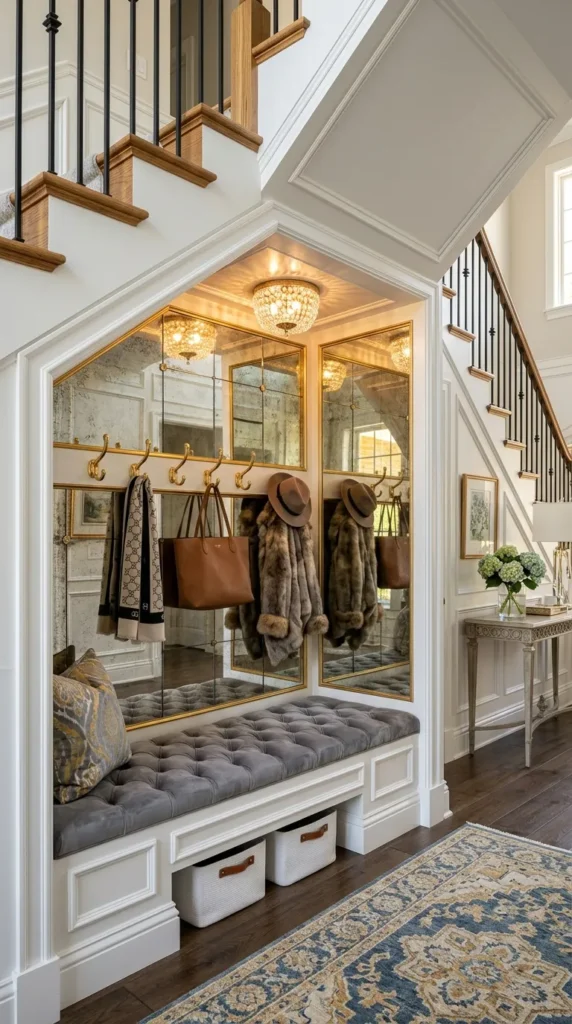
16. Glam Metallic & Mirror Mudroom Nook
Introduction
If your decor leans toward modern luxury and glam, transform your under-stair space with mirrored back panels, polished brass or gold accents, and plush velvet upholstery. It serves as both a practical entry drop-zone and a luxurious vanity-like nook.
How to Build It
Fit antique mirrored glass panels along the interior back wall of the stair nook. Build a sleek white lacquer bench with a tufted velvet seat cushion. Install polished gold or chrome double hooks along the side casing.
Tips & Variations
- Lighting: Install a delicate crystal mini-chandelier or polished brass sconces overhead.
- Maintenance: Use antique tinted mirror glass to reduce the visibility of fingerprints and dust.
- Variation: Use polished marble tops on shoe cabinets for an elevated finish.
17. Urban Apartment Drop-Zone with Desk Hybrid
Introduction
In compact city apartments, multi-functional furniture is essential. An under-stair mudroom can be dual-purposed to act as both an entryway organization station and a compact drop-zone home office or laptop nook.
How to Build It
Extend the bench surface to standard desk height (29 to 30 inches) across part of the space. Install slim drawer units beneath for mail, keys, and office supplies. Mount coat hooks on the outer side wall, leaving the main desktop clear for a laptop or charging hub.
Tips & Variations
- Cable Management: Drill grommets into the desktop surface to hide phone and laptop charging cables.
- Stool Storage: Choose a small tuck-away stool or ottoman that slides completely under the desk when not in use.
- Variation: Use pegboard wall paneling behind the desk for fully customizable hook and shelving layouts.
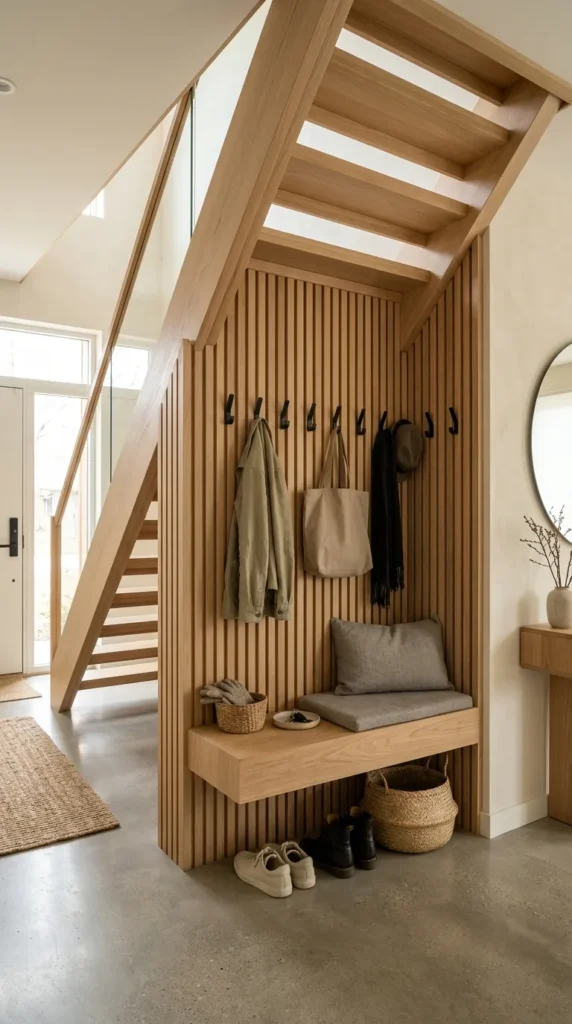
18. Japandi Slatted Wood Nook
Introduction
Japandi style blends Japanese minimalism with Scandinavian functionality. A mudroom built around thin vertical wood slats (tambour or acoustic slatted panels) creates serene rhythm, beautiful texture, and a calm, clutter-free vibe.
How to Build It
Apply pre-made slatted oak or walnut wood panels to the back wall following the staircase incline. Mount a floating box-style bench with handleless push-to-open doors below. Keep hardware minimal, using simple matte black wire hooks mounted directly between wood slats.
Tips & Variations
- Wood Tone: Use light warm oak, natural birch, or rich walnut paired with soft off-white or light gray surroundings.
- Declutter: Rely heavily on closed internal storage so the slatted wall remains the star visual element.
- Variation: Incorporate a small round wall mirror offset to one side for quick outfit checks before heading out.
19. Open Framed Hall Tree Insert
Introduction
For a straightforward DIY project that doesn’t require extensive custom cabinetry, construct or adapt a custom-fit open hall tree that sits neatly into the under-stair niche like a precision puzzle piece.
How to Build It
Measure the precise dimensions and angles of your stair opening. Build a freestanding unit with an integrated bench, lower shoe grid, and upper shelf frame using high-grade plywood or solid timber. Slide the completed hall tree unit into the stair alcove and secure it to wall studs with corner brackets.
Tips & Variations
- Trim Integration: Add matching baseboards across the bottom of the unit so it appears entirely built-in.
- Finish: Stain the wood to match the stair treads above for a cohesive look.
- Variation: Add upper overhead cubbies with drop-down doors for off-season items like scarves and gloves.
20. Monochromatic Grid Cubby & Locker System
Introduction
Inspired by school lockers, a grid-based mudroom system creates individual personalized stalls for each family member. Painting the entire setup in a single bold monochromatic color makes a strong modern design statement.
How to Build It
Build vertical dividers under the stairs to create individual vertical locker compartments tailored to the stair height. Paint the entire structure—including walls, shelves, dividers, and bench surfaces—in one single color (such as olive green, warm terracotta, or classic navy).
Tips & Variations
- Personalization: Add small brass label plates or chalkboard tags above each vertical compartment for family members.
- Finish: Use a durable satin or eggshell paint finish for easy cleaning and wipeability.
- Variation: Add slim locker-style metal mesh or louvered doors to individual compartments for semi-concealed storage.