
Pottery is one of the most rewarding and tactile forms of art. Unlike wheel-thrown pottery, which requires specialized machinery and years of practice to master, hand-built pottery allows you to create stunning, functional, and decorative pieces using just your hands, simple tools, and raw clay. Hand-building embraces natural textures, organic imperfections, and unique personal artistic signatures.
Whether you are working with air-dry clay, polymer clay, or traditional ceramic clay in a studio, this guide explores 20 inspiring hand-built pottery projects designed to elevate your craft and style.

1. Organic Textured Mug
What This Idea Means
An organic textured mug moves away from perfectly symmetrical, machine-made coffee cups. It features hand-pressed textures, subtle thumb indentations, and an earthy, rustic silhouette that makes holding your morning beverage an intimate, tactile experience.
How to Make It
- Roll out a flat clay slab roughly $\frac{1}{4}$ inch thick using a rolling pin and guide sticks.
- Cut out a rectangular piece for the body and a circular piece for the base.
- Imprint textures onto the slab using natural materials like burlap, dried leaves, or carved wooden stamps.
- Curve the rectangle into a cylinder, score (scratch) the joining edges, apply slip (clay slurry), and seam them together.
- Attach the cylinder to the circular base, scoring and slipping the connection.
- Pull or roll a comfortable handle, attach it securely, and smooth the seams with a soft sponge.
Tips and Variations
- Tip: Ensure the handle attachments are thoroughly blended into the body to prevent cracking during drying.
- Variation: Add thumb rests at the top of the handle or create a footed base for an antique aesthetic.
2. Ribbed Pinch Bowl Set
What This Idea Means
Pinch bowls are foundational hand-building projects. By adding vertical ribs or flutes along the outer walls, you turn simple nesting bowls into elegant modern kitchen accessories or jewelry dishes.
How to Make It
- Divide clay into small, equal-sized spheres.
- Insert your thumb into the center of a sphere without pushing all the way through.
- Gently pinch the clay upward and outward between thumb and fingers, rotating continuously to form a bowl.
- Use a wooden modelling tool or your fingers to press vertical grooves around the exterior.
- Smooth the upper rim with a damp sponge.
Tips and Variations
- Tip: Work slowly to keep the wall thickness uniform ($\frac{1}{4}$ inch) so the bowl dries evenly.
- Variation: Make a set of three nesting sizes and glaze each in a slightly different shade of the same color palette.
3. Botanical Imprinted Wall Sconce
What This Idea Means
A botanical wall sconce blends nature with home decor. It forms a hanging ceramic pocket designed to hold dried flowers, propagation cuttings, or small air plants.
How to Make It
- Roll out a large, smooth slab of clay.
- Press fresh fern fronds, eucalyptus stems, or lace gently into the surface with a rolling pin, then carefully lift them out.
- Cut a flat backboard plate and a curved front pocket piece.
- Score and slip the outer curve of the pocket to the backboard plate.
- Punch a sturdy hanging hole near the top of the backboard before the clay dries.
Tips and Variations
- Tip: Make the hanging hole slightly larger than needed, as clay shrinks during drying and firing.
- Variation: Oxide washes emphasize the delicate leaf details within the botanical impressions.
4. Geometric Taper Candle Holders
What This Idea Means
Sculptural candle holders with clean geometric planes, archways, or stacked spheres bring modern mid-century aesthetic vibes to candlelit tables.
How to Make It
- Cut precise geometric shapes (cubes, cylinders, or arched slabs) out of firm clay slabs.
- Join the shapes using score-and-slip techniques to build a multi-tiered or arch structure.
- Hollow out a central socket measuring slightly over $\frac{7}{8}$ inch (standard taper candle diameter).
- Smooth the flat planes with a rib tool to ensure crisp geometric edges.
Tips and Variations
- Tip: Test candle fit while the clay is soft, accounting for shrinkage.
- Variation: Create modular blocks that can be rearranged into different table centerpiece configurations.
5. Coil-Built Fluted Floor Vase
What This Idea Means
Coil building allows you to construct tall, dramatic vessels without a pottery wheel. Adding a fluted edge gives the vase movement and elegance.
How to Make It
- Start with a thick circular slab base.
- Roll out long, even ropes (coils) of clay using the palms of your hands.
- Stack coils atop the base, blending the inside seams while leaving or smoothing the exterior.
- Gradually widen the coils outward for the belly, then narrow them toward the neck.
- Flare the top rim outward and pinch gently at intervals to form delicate flutes.
Tips and Variations
- Tip: Build in stages to allow lower coils to stiffen slightly, keeping the vase structural.
- Variation: Leave the exterior coils exposed for an authentic raw-patterned look.


6. Archway Incense Burner
What This Idea Means
Inspired by Mediterranean architectural forms, this functional incense burner catches falling ash inside a minimalist, arched clay frame.
How to Make It
- Roll a slab and cut out a curved arch ribbon and a long rectangular tray base.
- Score and slip the arch ends to attach across the width of the tray.
- Poke a small hole in the upper center of the arch or on a small pillar base inside the tray to hold the incense stick securely.
- Smooth all edges with a damp sponge.
Tips and Variations
- Tip: Ensure the ash tray extends long enough beneath the arch to catch ash from burning incense.
- Variation: Add small carved windows or terraced steps for a whimsical mini-structure look.
7. Slab-Built Scalloped Tray
What This Idea Means
A scalloped tray features undulating wavy borders, making it ideal as a vanity tray, perfume holder, or coffee table catchall.
How to Make It
- Roll out a large, even slab of clay ($\frac{1}{4}$ to $\frac{3}{8}$ inch thick).
- Cut out your base shape (oval, rectangle, or circle).
- Cut a long strip of clay, using a round cutter or knife to shape one edge into repeating scallops.
- Score and attach the scalloped strip vertically around the base edge.
- Support the soft scallops with rolled paper towels while drying.
Tips and Variations
- Tip: Keep clay workable by covering it with plastic wrap when assembling intricate borders.
- Variation: Paint with pastel glossy glazes to accentuate the playful scalloped silhouette.
8. Speckled Matcha Bowl (Chawan)
What This Idea Means
A traditional tea bowl crafted via hand-pinching and carving, capturing wabi-sabi aesthetics—the appreciation of natural beauty in imperfection.
How to Make It
- Form a large ball of clay mixed with specks or grog.
- Pinch out a deep, wide bowl with a thick, grounded bottom.
- Allow the clay to reach leather-hard firmness.
- Use loop carving tools to shave down the lower exterior, creating facets and an expressive foot ring.
Tips and Variations
- Tip: Keep the rim soft and comfortable against the lips.
- Variation: Apply reactive or drip glazes that pool organically over the carved exterior facets.
9. Modern Curved Bookends
What This Idea Means
Heavy, sculptural clay bookends functional enough to support books while serving as eye-catching bookshelf decor.
How to Make It
- Cut thick slab pieces to build hollow, structural solid shapes (arcs, half-circles, or U-shapes).
- Internal clay struts can be added inside hollow structures to prevent sagging.
- Miter slab edges at $45^\circ$ angles for clean, seam-free corner joins.
- Seal all joints thoroughly and leave a tiny air pinhole in the base so trapped air can escape during firing.
Tips and Variations
- Tip: Weight is key; keep base walls substantial so the bookends remain functional.
- Variation: Coat with textured matte granite effect glazes or leave raw and burnished.
10. Abstract Face Sculpture Planter
What This Idea Means
Combining figurative art with home greenery, this project features simplified linear or raised face elements integrated onto a clay planter surface.
How to Make It
- Slab-build or coil-build a cylindrical planter pot with a drainage hole in the base.
- Roll thin clay coils or small shapes to form continuous line features (eyes, nose, lips).
- Score, slip, and join these facial details carefully onto the front of the pot.
- Smooth connections using fine clay sculpting tools.
Tips and Variations
- Tip: Keep facial elements low profile to avoid accidental breakage during handling.
- Variation: Carve abstract face line art directly into the leather-hard wall instead of applying raised clay.


11. Tiered Jewelry Tower
What This Idea Means
A multi-level organizer featuring stacked clay dishes connected by a central pillar, perfect for holding rings, earrings, and necklaces.
How to Make It
- Create two or three clay dishes of decreasing sizes using slabs or pinch techniques.
- Roll thick, sturdy central support cylinders for each tier level.
- Assemble the tower from bottom to top, scoring and slipping joints thoroughly.
- Ensure the structure is balanced and completely level before drying.
Tips and Variations
- Tip: Internal wooden skewers can reinforce central support pillars while clay is wet.
- Variation: Add small hooks or branch-like extensions to the top pillar for hanging rings.
12. Braided Handle Serving Dish
What This Idea Means
A spacious, shallow ceramic serving dish elevated by intricate woven or braided clay handles on either side.
How to Make It
- Drape a slab of clay over a shallow plaster form or existing bowl to form the main dish shape.
- Trim edges neatly when leather-hard.
- Roll three long, flexible clay strands and braid them together smoothly.
- Cut the braid into two equal handles, score, slip, and secure them firmly to opposite sides of the dish.
Tips and Variations
- Tip: Keep clay strands moist while braiding to avoid surface cracking.
- Variation: Use two thick strands twisted together for a rope-style handle look.
13. Wavy Pedestal Bowl
What This Idea Means
An elevated fruit bowl or centerpiece bowl featuring a wavy, ruffled edge set atop a sturdy cylindrical pedestal foot.
How to Make It
- Slab-build or pinch a wide, open bowl form.
- While soft, gently manipulate the rim using your fingers to create elegant, flowing wave curves.
- Slab-build a thick hollow cylinder or cone to act as the pedestal base.
- Join the pedestal base centrally to the bottom of the bowl using score-and-slip techniques.
Tips and Variations
- Tip: Support the undulating curves of the rim with foam wedges until dry.
- Variation: Add contrasting colors between the inner bowl surface and the outer pedestal foot.
14. Embossed Ceramic Butter Dish
What This Idea Means
A covered kitchen accessory consisting of a fitted flat base plate and a handle-topped cover, detailed with subtle geometric or vintage floral embossing.
How to Make It
- Cut a flat rectangular slab base with a raised lip edge around the perimeter.
- Imprint embossing stamps onto a slab, then cut and fold it to build a matching rectangular box lid.
- Add a clay knob or loop handle to the top center of the lid.
- Fit the lid onto the base while wet to verify proper clearance, accounting for shrinkage.
Tips and Variations
- Tip: Dry the lid directly on the base (separated by paper tissue) to preserve fitting dimensions.
- Variation: Use vintage lace fabrics to emboss intricate patterns across the top lid surface.
15. Minimalist Wall Clock Face
What This Idea Means
A contemporary art piece that combines hand-built clay textures with working clock mechanisms.
How to Make It
- Roll out a uniform, flat, circular slab of clay ($\frac{3}{8}$ inch thick).
- Cut a crisp $\frac{5}{16}$ inch hole directly through the precise center for the clock spindle.
- Impress subtle hour tick marks, minimal dots, or smooth textures onto the surface.
- Dry slowly under flat boards to prevent warping.
- After firing/drying, install standard battery-powered clock mechanism components through the center.
Tips and Variations
- Tip: Flip the slab daily during the drying phase to prevent warping or edge lifting.
- Variation: Create non-circular, asymmetrical organic shield shapes for modern abstract clock faces.


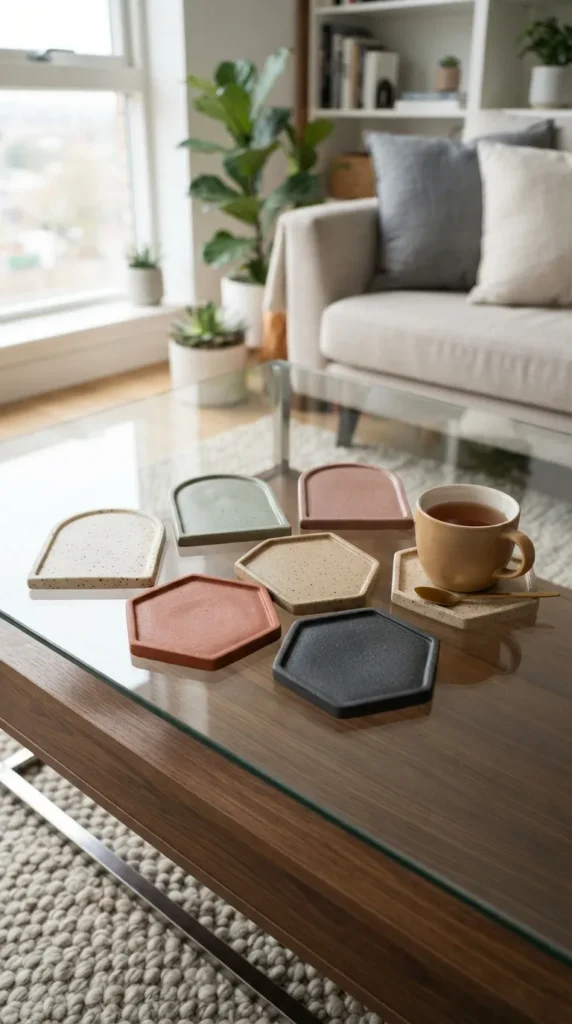
16. Chunky Geometric Coaster Set
What This Idea Means
Functional, thick clay coasters designed in modern shapes like arches, hexagons, or rounded squares to protect surfaces in style.
How to Make It
- Roll out a flat clay slab roughly $\frac{3}{8}$ inch thick.
- Cut uniform shapes using cookie cutters or acrylic templates.
- Carve thin accent grooves or press terrazzo-style speckles into the surfaces.
- Smooth outer edges thoroughly with a damp sponge.
Tips and Variations
- Tip: Attach tiny felt pads to the underside after firing to avoid scratching furniture surfaces.
- Variation: Glaze with contrasting half-and-half color block patterns.
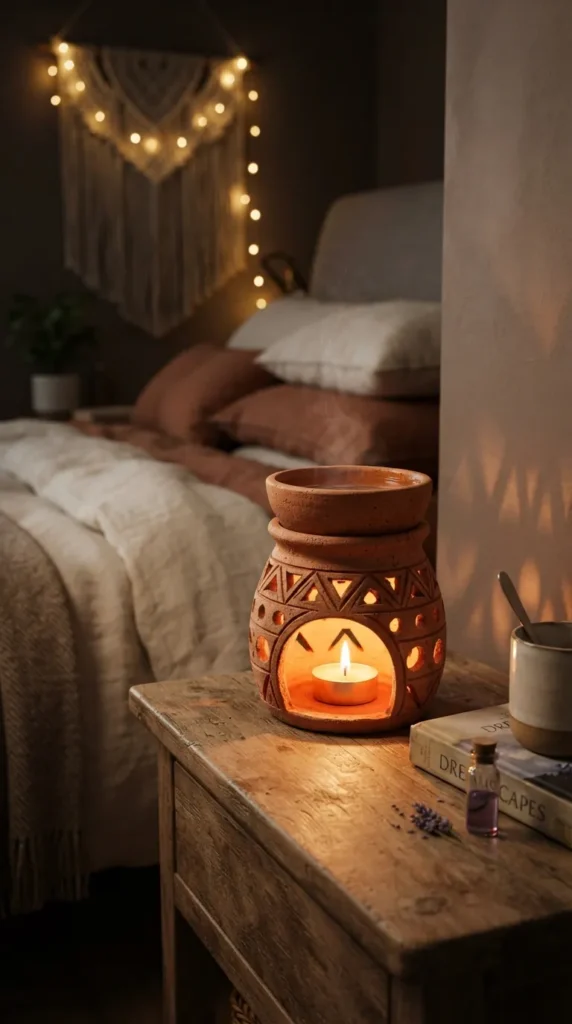
17. Terracotta Oil Diffuser Vessel
What This Idea Means
A warm, rustic ceramic vessel designed to hold essential oils and tealight candles, filling living spaces with ambient aroma and light.
How to Make It
- Build a hollow cylinder base using coils or slabs.
- Carve small arched cutout windows near the bottom to allow light flow and air ventilation for a candle.
- Pinch a shallow dish that rests securely on top of the vessel to hold water and essential oils.
- Assemble or keep as a two-piece removable set for easy cleaning.
Tips and Variations
- Tip: Ensure adequate top ventilation openings so the candle flame burns steadily.
- Variation: Carve star or moon cutouts to throw decorative shadows across walls when lit.
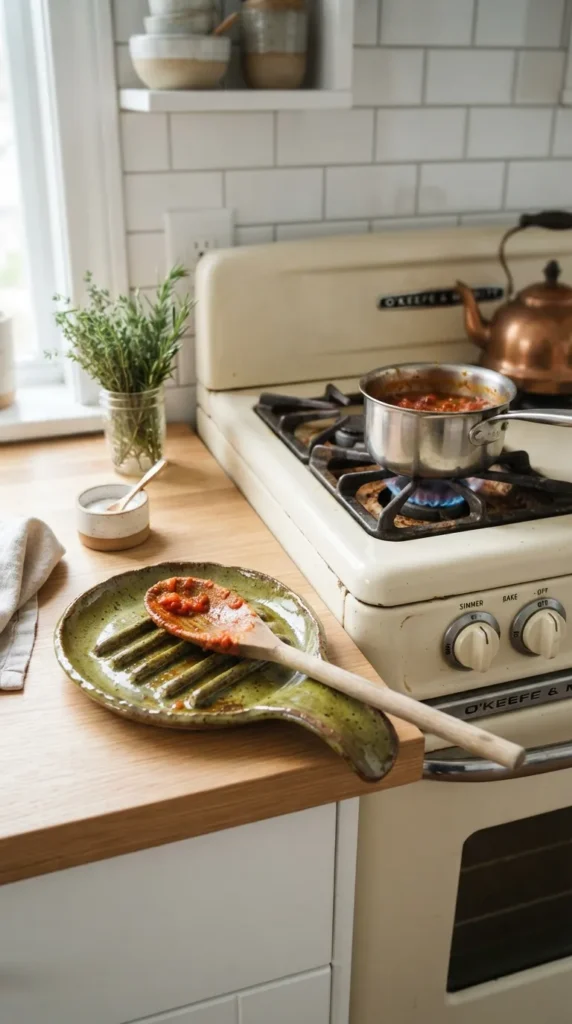
18. Modern Ribbed Spoon Rest
What This Idea Means
A stylish stove-side companion featuring an ergonomic handle rest and raised ribbed ridges to keep cooking tools elevated and clean.
How to Make It
- Form an elongated, shallow spoon tray shape using pinch or slab methods.
- Add a gently sloping handle rest section at one end.
- Press thin horizontal clay ridges into the main bowl area to hold utensils above oil drips.
- Smooth edges with damp tools.
Tips and Variations
- Tip: Use a smooth, non-porous glossy glaze so sauce splatters wipe off effortlessly.
- Variation: Create a double spoon rest wide enough for multiple cooking utensils.
19. Sculptural Shell Trinket Dish
What This Idea Means
A coastal-inspired accent dish modeled after clam or scallop shells, perfect for storing rings, keys, or loose treasures.
How to Make It
- Flatten a small clay ball into a smooth oval slab.
- Pinch and fan out one side to recreate a natural seashell outline.
- Use a dull knife or rib tool to radiate fan-like groove channels from the hinge base out to the scalloped edge.
- Gently curve the dish edges upward inside a bowl mold to dry.
Tips and Variations
- Tip: Use real seashells to stamp authentic micro-textures into the clay surface.
- Variation: Apply iridescent or pearlized luster glazes to replicate natural mother-of-pearl shimmer.
20. Layered Landscape Ceramic Tile
What This Idea Means
A relief ceramic wall tile featuring layered clay slabs that represent stylized mountain ranges, desert dunes, or serene ocean waves.
How to Make It
- Roll a sturdy square or rectangular background slab base.
- Cut overlapping undulating wave or mountain profile strips from thin slabs.
- Layer and attach the strips progressively from top to bottom using score-and-slip techniques.
- Blend the lower edges seamlessly into the base tile frame.
Tips and Variations
- Tip: Keep the overall thickness under $1$ inch to avoid drying cracks and excessive weight.
- Variation: Use stain-tinted clay bodies to create a natural gradient of earthy mountain tones without glaze.


