Redstone is the absolute heart of survival engineering in Minecraft. While manual farming has its own quiet charm, transitioning to fully or semi-automated redstone farms transforms how you experience the game. Instead of spending hours harvesting crops, breeding livestock, or grinding mob drops, automated systems handle the heavy lifting while you focus on mega-builds and grand adventures.

Below is a complete collection of 20 high-efficiency redstone farm ideas designed to elevate your survival world, keep your storage chests bursting with resources, and look fantastic inside your base.
1. Fully Automatic Sugarcane & Bamboo Farm

What This Idea Means

Sugarcane and bamboo are essential survival resources used for paper, trading, rockets, fuel, and scaffolding. A redstone-powered observer farm automatically clips the top growth of these plants the moment they reach a specific height, storing the yields instantly without any player interaction.

How to Make It

  • Place dirt or grass blocks in a row with a water channel running alongside them (required for sugarcane).
  • Plant your sugarcane or bamboo on the dirt blocks.
  • Place pistons facing the top growth level of the plants (one block above the base plant).
  • Mount Observers above each piston, facing the plant path.
  • Connect the back of the observers to the back of the pistons using solid blocks and redstone dust.
  • Place hoppers connected to a chest underneath a collection water stream or running along a hopper minecart track under the dirt blocks.

Tips & Variations

Pro Tip: Enclose the entire build in glass to prevent broken items from launching onto adjacent blocks. For a high-efficiency alternative, replace the water stream with a hopper minecart running continuously back and forth on powered rails directly underneath the dirt blocks.

2. Micro-Crop Bonemeal Farm (Wheat, Carrots, Potatoes, Beetroot)

What This Idea Means

A micro-farm compresses crop growth into split-second cycles. By surrounding a single crop with bonemeal dispensers hooked to a rapid redstone clock, you can hold down the build key and harvest hundreds of crops in under two minutes.

How to Make It

  • Till a central block of farmland and hydrate it with a hidden water source beneath or behind it.
  • Position three dispensers facing the farmland block on three sides.
  • Place a piston adjacent to or directly below the farmland block, or set up a quick-harvest mechanism.
  • Wire a redstone clock (using repeaters or observers facing each other) to activate all three dispensers simultaneously.
  • Fill the dispensers with bonemeal and place a hopper collection tray at your feet.

Tips & Variations

Variation: Swap the crop for sweet berries or cocoa beans with minor structural tweaks to quickly level up villager trades or build massive dye reserves.

3. Automatic Pumpkin & Melon Split-Farm

What This Idea Means

Melons and pumpkins grow adjacent to their main stem, making traditional farming bulky. A redstone split-farm uses individual observer-piston modules to harvest each block the instant it grows, keeping stem loss to zero and maximizing item throughput.

How to Make It

  • Create alternating rows of farmland (for stems) and wet dirt/grass blocks (where the fruit spawns).
  • Place observers facing the stem growth path or the actual fruit spot.
  • Wire the redstone output directly to a downward-facing piston positioned right over the fruit block spot.
  • Run a hopper minecart collection system directly beneath the growing blocks to pick up dropped items through solid ground.

Tips & Variations

Pro Tip: Keep the farm lit with hidden sea lanterns or glowstone underneath the stems. Crops stop growing in darkness, so constant light keeps your redstone system running around the clock.

4. Zero-Tick Style Kelp Farm

What This Idea Means

Kelp is one of the most versatile renewable fuel sources in Minecraft when dried into dried kelp blocks. A dedicated automated kelp farm continuously cuts top kelp growth, sending it straight into a smoker array for self-sustaining smelting fuel.

How to Make It

  • Build a water column contained by glass blocks, with kelp planted on sand or dirt at the base.
  • Place a piston one block above the base kelp plant.
  • Position an observer at the top water block to detect growth.
  • Wire redstone from the observer to the piston to slice the middle block of the kelp column.
  • Collect floating kelp at the top using a running water current directed straight into hoppers.

Tips & Variations

Variation: Hook the output directly into a continuous furnace array. The kelp feeds into smokers, dries out, gets crafted into kelp blocks, and feeds back into the smokers as fuel!

5. Multi-Tiered Cooked Chicken & Egg Farm

What This Idea Means

This iconic redstone build functions as an all-in-one food factory. Chickens lay eggs on top of a hopper, which fires the eggs into a lower chamber where baby chicks hatch. Once they grow up, a brief blast of lava cooks them automatically.

How to Make It

  • Create a top holding chamber with adult chickens sitting on a layer of hoppers.
  • Direct these hoppers into a dispenser pointed into a bottom slab-based chamber.
  • Attach a comparator clock to the dispenser so it automatically shoots eggs as soon as they drop.
  • Place a dispenser filled with a lava bucket directly above the lower chamber, wired to fire briefly when triggered, or keep a persistent lava source block above an open sign/slab where only adult chickens reach it.
  • Place a collection hopper below the bottom slab leading to your food vault.

Tips & Variations

Pro Tip: Keep your chicken population around 20–30 entities in the upper chamber to avoid hitting local mob caps while maintaining steady output.

6. Automated Wool Farm (All 16 Colors)

What This Idea Means

Instead of manually shearing sheep, this farm uses dispensers equipped with shears that fire whenever a sheep eats grass. It allows you to automatically gather massive quantities of every wool color in the game simultaneously.

How to Make It

  • Construct individual 1×1 glass modules for each sheep color, with a grass block as the floor.
  • Place an observer directly behind the grass block, facing into it to detect when the grass gets eaten.
  • Place a dispenser above the observer (facing inside the sheep cell) loaded with shears.
  • Put redstone dust on top of a solid block behind the dispenser to complete the loop.
  • Run a hopper minecart track beneath all 16 grass blocks to collect wool drops instantly.

Tips & Variations

Variation: Build these modules into a vibrant circle or line wall decorated with colored concrete corresponding to the sheep inside for a sleek, aesthetic storage showroom.

7. Iron Golem Farm with Redstone Flushing System

What This Idea Means

Iron is vital for rails, hoppers, anvils, and beacons. An iron farm uses panicked villagers to spawn Iron Golems, which are then swept into a lava blade via redstone-controlled water currents or continuous streams for infinite iron ingots.

How to Make It

  • Elevate a villager pod holding at least three villagers with beds, isolated from standard ground level.
  • Use a trapped Zombie in a minecart or on a redstone dispenser loop to periodically scare the villagers.
  • Construct a spawning platform above or adjacent to the villagers with gates/water streams.
  • Direct water currents toward a 2×2 lava drop chamber held up by signs.
  • Place hoppers covered by carpet or slabs beneath the lava chamber to collect iron ingots and poppies.

Tips & Variations

Pro Tip: Filter out the poppies using an item sorter system and run them into a composter to generate free bonemeal alongside your iron supply!

8. Automated Honey & Honeycomb Farm

What This Idea Means

Honey and honeycomb are critical for redstone builders and aesthetic decorators alike. This farm uses observers to detect when bee hives reach maximum honey levels, firing glass bottles or shears instantly without angering the bees.

How to Make It

  • Place Bee Hives facing outward with flowers positioned directly in front of them inside a enclosed greenhouse structure.
  • Mount a comparator on the back of each hive to measure the honey fill level (it outputs signal strength 5 when full).
  • Place a dispenser directly over or behind the hive facing into it, filled with shears (for honeycomb) or glass bottles (for honey bottles).
  • Connect the output of signal strength 5 to trigger the dispenser automatically.
  • Collect the items using hoppers underneath the flower pathways.

Tips & Variations

Pro Tip: Ensure a campfire (with carpet on top to protect the bees) is placed beneath the hive if you ever need to manually adjust blocks without getting attacked.

9. High-Output Mob Grinder with Flush System

What This Idea Means

A general mob farm spawns hostile mobs (skeletons, zombies, creepers) in dark platforms, then uses redstone water dispatchers on a timer loop to sweep them into a killing chute for gunpowder, bones, string, and arrows.

How to Make It

  • Build several large, stacked spawning platforms inside a totally dark sky-high enclosure.
  • Place a dispenser loaded with a water bucket in the center of each platform.
  • Interconnect all dispensers with a vertical redstone ladder or observer column linked to an adjustable hopper clock.
  • When the clock pulses, water spreads across platforms, pushing spawned mobs into a central chute.
  • The next pulse retracts the water, letting new mobs spawn. Mobs fall to a low platform for easy player killing or immediate magma-block elimination.

Tips & Variations

Variation: Add a toggle switch that routes mobs to either a low-health fall distance (for player XP farming) or a magma block drop (for 100% AFK drop gathering).

10. Semi-Automatic Tree / Wood Farm

What This Idea Means

Manual tree harvesting can be slow and tedious. A redstone wood farm lets you plant saplings, bone-meals them instantly, and uses a redstone piston push-tape to move the grown wood into a neat block grid for easy mass mining.

How to Make It

  • Create a central sapling planting station with three dispensers filled with bonemeal pointing at the sapling spot.
  • Place a smart piston system (piston triggered by an observer) directly next to where the log grows.
  • Build a large array of pistons wired in a push-tape grid that moves log pillars sideways and back whenever a log enters the main lane.
  • Use a block height limit block (like smooth stone or terracotta) 8 blocks above the sapling to prevent unruly oak branch trees from ruining the mechanism.

Tips & Variations

Pro Tip: Use concrete or obsidian boundaries to keep the piston assembly from pushing beyond the 12-block redstone push limit.

11. Automated Villager Crop Farm (Carrots/Potatoes)

What This Idea Means

Farmer villagers harvest crops when their inventories are full and try to share food with other villagers. By trapping an hungry villager nearby, you can trick the farmer into throwing crops into a redstone hopper collection system indefinitely.

How to Make It

  • Build a fully enclosed farm plot with hydrated farmland and lighting.
  • Place a Farmer Villager inside with a composter and plant either carrots or potatoes.
  • At the edge of the farm, trap a second villager behind a hopper setup protected by a trapdoor.
  • When the farmer harvests and attempts to throw food to the trapped villager, the items fall directly into the hoppers instead.

Tips & Variations

Pro Tip: Make sure the farmer’s inventory is filled completely with the specific crop you are farming before starting, so no seed or crop mix-ups occur!

12. Smart Nether Wart Farm

What This Idea Means

Nether wart cannot be grown with bonemeal, making automation crucial. A smart nether wart farm uses observer-based detection or simple water flushing mechanisms triggered by a single button press to strip full crops instantly into storage.

How to Make It

  • Layout soul sand platforms on step-down terraces or long running strips.
  • Plant your nether wart along the rows.
  • Place dispensers containing water buckets at the highest point of each row.
  • Connect all dispensers to a single central button or tripwire detector system.
  • At the base of the farm, install a running water collector lane leading straight into a chest with connected hoppers.

Tips & Variations

Variation: Because water destroys nether wart instantly without breaking the soul sand, you can combine this with an item sorter system in your brewing room for instant alchemy supply!

13. Automatic Dripleaf & Moss Farm

What This Idea Means

Moss blocks and big dripleaf are fantastic decorative items that grow rapidly with bonemeal. A moss farm converts surplus bonemeal into moss blocks, carpets, azalea bushes, and seeds, sweeping them through a composter to stay 100% self-sustaining.

How to Make It

  • Place a central moss block surrounded by smooth stone blocks.
  • Mount a bonemeal dispenser pointing down into the moss block.
  • Place water dispenser pistons along the border to flush converted moss materials.
  • Connect observers to trigger a piston-smash system that breaks the top moss layer into items.
  • Filter dropped seeds and carpets into composters to re-generate the bonemeal used to power the farm!

Tips & Variations

Pro Tip: This farm is one of the best ways to earn massive amounts of exp points and decorative foliage blocks simultaneously.

14. AFK Fishing Farm with Redstone Note Block Trigger

What This Idea Means

An automated fishing system lets players gather food, enchanted books, bows, and nautilus shells while AFK by using precise redstone interactions with an iron door, tripwire hook, or note block.

How to Make It

  • Dig a small trench and place a chest connected to a hopper.
  • Place a water block over the hopper held in place by a sign or fence post.
  • Place a tripwire hook system directly above the water block.
  • Place an iron trapdoor or note block connected to redstone dust right behind the tripwire hook.
  • Aim your fishing rod at the tripwire/note block setup and hold down right-click.

Tips & Variations

Pro Tip: Ensure the water block has direct sky light access above it to maintain maximum fishing speeds and treasure drop rates!

15. Redstone Lava / Pointed Dripstone Generator

What This Idea Means

Lava is one of the best long-burning fuel sources in Minecraft. Combining pointed dripstone, lava source blocks, and a simple redstone hopper-cauldron system creates an infinite, safe fuel generation plant right in your basement.

How to Make It

  • Build an elevated row of lava source blocks held in place by solid structural blocks.
  • Place pointed dripstone hanging directly underneath the blocks holding the lava.
  • Place cauldrons directly underneath each pointed dripstone stalactite.
  • Connect a continuous hopper line under or alongside the cauldrons or set up a quick-empty bucket dispenser network.

Tips & Variations

Variation: Attach an observer to detect when cauldrons fill with lava, illuminating a redstone lamp display on your base dashboard so you know exactly when fuel is ready for collection!

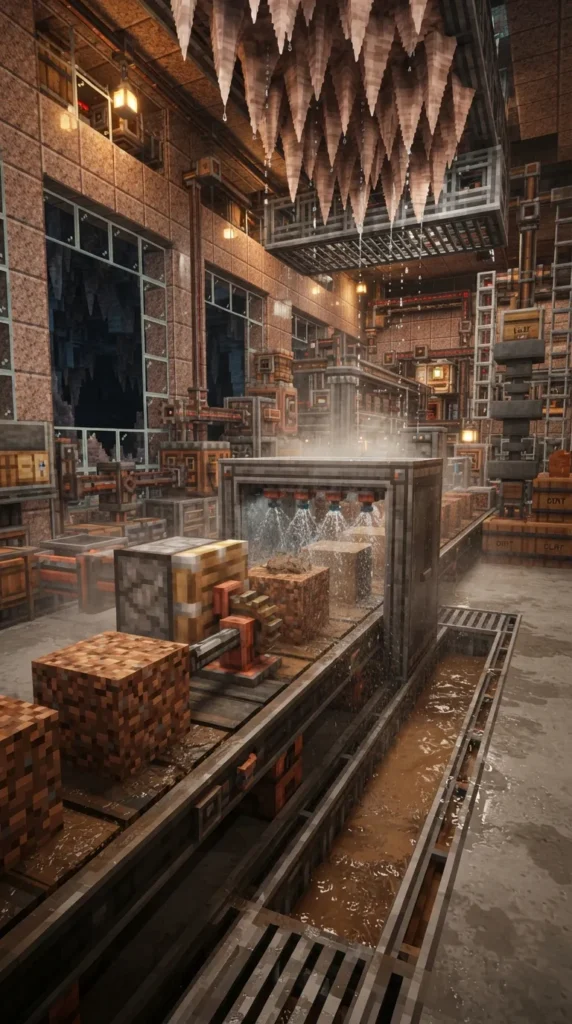
16. Automated Mud & Clay Factory

What This Idea Means

Clay is a valuable building material that can be difficult to collect in large quantities. By using a redstone dispenser filled with water bottles on dirt blocks, you convert plain dirt into mud instantly, which then drains into clay over dripstone.

How to Make It

  • Setup a dirt-feeding block piston line.
  • Position a dispenser with water bottles triggered by an observer every time a dirt block is pushed into place.
  • The dirt turns to mud instantly upon being watered.
  • Push the mud blocks using a second redstone piston line over a floor made of pointed dripstone with air blocks beneath.
  • Over time, the dripstone drains the moisture, turning the mud into solid clay blocks for easy harvesting!

Tips & Variations

Pro Tip: Keep a large water source connected via hoppers and glass bottles to keep the water dispenser permanently supplied.

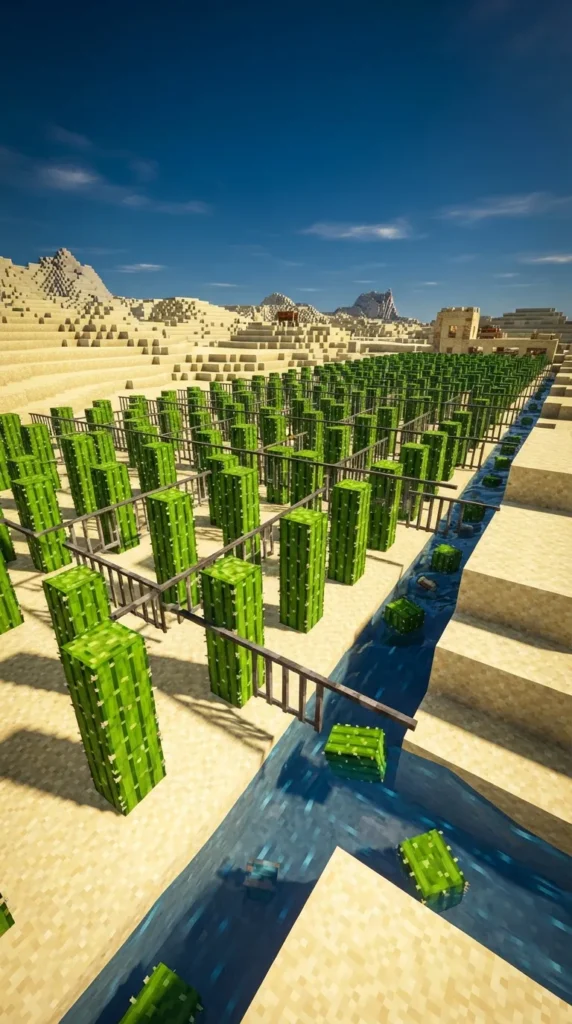
17. High-Speed Cactus Bonemeal Farm

What This Idea Means

Cactus automatically pops off into an item whenever a solid block is placed directly adjacent to its top growth ring. This property makes cactus farms effortless to automate without using active pistons or heavy redstone wiring.

How to Make It

  • Place sand blocks in a checkerboard pattern, keeping a 1-block space between each.
  • Plant cacti on top of each sand block.
  • Place fence posts or iron bars suspended one block above and between the cacti spaces.
  • When a cactus grows up, it hits the fence post and instantly pops into an item drop.
  • Create a floor of flowing water beneath the sand posts to carry dropped cactus items directly into hoppers leading into composters.

Tips & Variations

Pro Tip: Route the output of this farm straight into an array of composters to turn cactus into continuous, zero-effort bonemeal for your other farms!

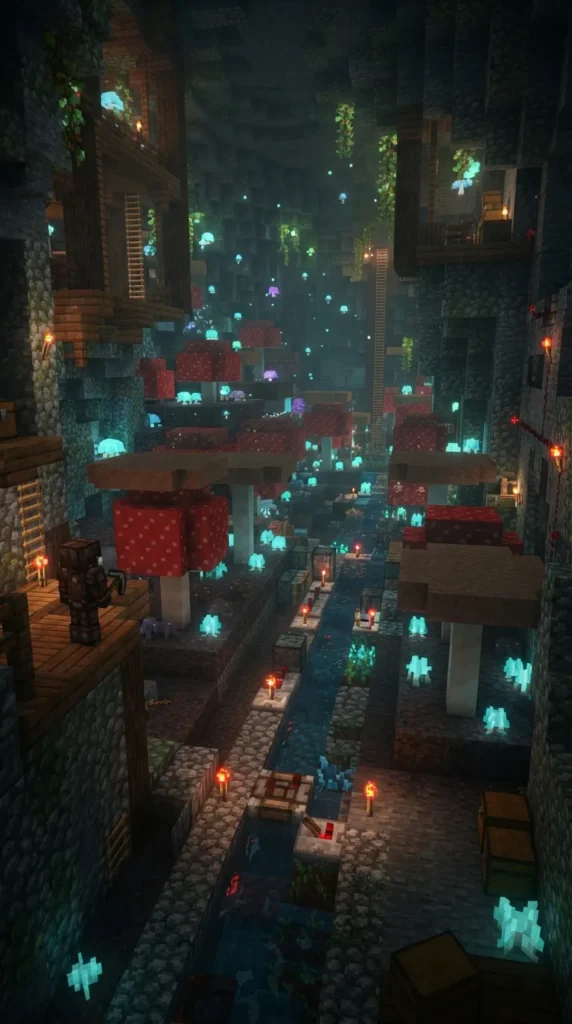
18. Redstone Mushroom Spreader & Flushing Farm

What This Idea Means

Mushrooms spread in low-light environments. A redstone mushroom farm uses light level controls and periodic water pulses across a dark chamber to harvest red and brown mushrooms automatically without breaking the seeding stocks.

How to Make It

  • Build a dark, fully enclosed chamber (Light level 12 or lower).
  • Create stepped pod tiers with mycelium or podzol blocks where parent mushrooms are planted.
  • Mount dispensers filled with water along the top walls of the chamber.
  • Wire the dispensers to a central redstone switch or long-delay repeater loop.
  • Turn on the water to wash all newly spread mushrooms down into a floor collector trench.

Tips & Variations

Pro Tip: Connect this farm output directly to your beetroot and bowl storage chest to quickly craft stew stock in survival mode!

19. Automatic Potion Brewing Stand Array

What This Idea Means

Manual potion brewing can be tedious when preparing for boss fights or mega-projects. A redstone brewing system lets you press a single button for a specific potion type (e.g., Strength II, Fire Resistance, Healing) and automatically brews exact recipes into chests.

How to Make It

  • Arrange a vertical line of hoppers pointing into a central Brewing Stand.
  • Mount individual dispensers along the side, each holding a specific ingredient (Nether Wart, Glowstone, Redstone, Blaze Powder, Special Ingredient).
  • Wire a series of pulse lengtheners and delay repeaters so pressing a selector button triggers dispensers in precise chronological order.
  • Feed glass water bottles into the bottom side of the stand using a dedicated hopper line.

Tips & Variations

Pro Tip: Add a redstone lamp interface that turns on when a brew batch is completed and ready for pickup!

20. Multi-Item Sorting & Storage System

What This Idea Means

The ultimate crown jewel of any redstone survival base is an automated multi-item sorting system. Using redstone comparators and item impulse filters, every item dropped into a master input chest is automatically organized into its own designated storage chest.

How to Make It

  • Build a long line of double chests stacked vertically, with hoppers running behind and on top of them.
  • Install a redstone comparator behind the upper filter hopper to measure its item capacity.
  • Fill the filter hopper with 4 dummy items (like named paper) and 18 units of the specific item you wish to sort.
  • Place a redstone torch beneath the filter hopper block, held off by a simple repeater wire loop.
  • When identical items pass through the main top hopper line, the comparator signal increases, releasing the torch and allowing items to drop neatly into the corresponding chest below.

Tips & Variations

Pro Tip: Place an overflow chest at the very end of your hopper transportation line to catch unsorted items or extra blocks when your main chests fill up!